今回はNodeJS環境での簡単なTodoを管理するWebアプリケーションをReactで作成します。
環境
Ubuntu 18.04.2 LTS
NodeJS: 10.16.0
npm: 6.10.3
Reactアプリケーションの立ち上げ
|
1 2 3 4 |
sudo npm install -g create-react-app create-react-app academy-react-app cd academy-react-app npm start |
下の画面が表示されれば成功です。
コンポーネントの編集
Reactのアプリケーションを立ち上げることができました。
それでは画面を編集していきます。
src/App.js の中身を以下のコードに置き換えてください。
|
1 2 3 4 5 6 7 8 9 10 11 12 13 14 15 16 17 18 19 20 |
import React from 'react'; import './App.css'; function App() { return ( <div className="App"> <h5>Sample Component</h5> <p> Text Before Changed </p> <button > Press Here! </button> </div> ); } export default App; |
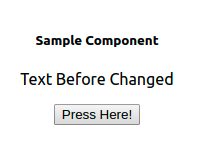
下のように表示されるはずです。
コンポーネントライブラリ
ここに今回はMaterial-UIというReactのコンポーネントライブラリを使って少しだけ見た目を整えます。
Reactでコンポーネントを使う時こういったライブラリを使うと便利です。
まずは必要なモジュールをインストールします。
一度コンソールでCtrl+Cでアプリを終了し、下のコマンドを入力・実行してください。
|
1 2 3 |
npm install @material-ui/core npm install @material-ui/styles |
App.jsの内容を以下に書き換えてください。
|
1 2 3 4 5 6 7 8 9 10 11 12 13 14 15 16 17 18 19 20 21 22 23 24 25 26 27 28 29 30 31 32 33 34 35 36 37 38 39 |
import React from 'react'; import { makeStyles } from '@material-ui/core/styles'; import Paper from '@material-ui/core/Paper'; import Typography from '@material-ui/core/Typography'; import Button from '@material-ui/core/Button'; import './App.css'; function App() { const useStyles = makeStyles(theme => ({ root: { padding: theme.spacing(3, 2), }, })); const classes = useStyles(); return ( <div className="App"> <Paper className={classes.root}> <Typography variant="h5" component="h3"> Sample Component </Typography> <Typography component="p"> Text Before Changed </Typography> <Button variant="contained" color="primary" > PRESS HERE! </Button> </Paper> </div> ); } export default App; |
保存して再度以下のコマンドを実行しましょう。
|
1 |
npm start |
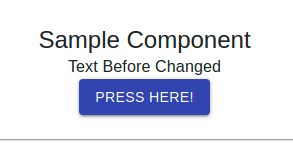
ブラウザで下のように表示されていれば問題ありません。
クリックイベント処理
さらにボタンのクリック時の動作を追加します。
|
1 |
<Button variant="contained" color="primary" > |
となっているところを以下のように書き換えてください。
|
1 |
<Button variant="contained" color="primary" onClick={() => alert("Button Pressed!")} > |
保存してブラウザ上でボタンをクリックすると「Button Pressed!」と表示されるはずです。
フックによるステート管理
ボタンで画面のコンポーネントを編集できるようにします。
まず、App.jsのReactをインポートしてる部分をuseState関数をインポートできるように以下のように変更してください。
|
1 |
import React, { useState } from 'react'; |
そしてreturn関数の前に下の一行を追加してください。
|
1 |
const [text, setText] = useState("Text Before chenged") |
続いてボタンのクリック時の動作を
|
1 |
alert("Button Pressed!") |
から
|
1 |
setText("Button Pressed!") |
にしてください。
最後に
|
1 |
<Typography component="p"> Text Before Changed </Typography> |
となっている部分を以下のように変更してください。
|
1 |
<Typography component="p">{text}</Typography> |
App.jsは以下のようになっているはずです。
|
1 2 3 4 5 6 7 8 9 10 11 12 13 14 15 16 17 18 19 20 21 22 23 24 25 26 27 28 29 30 31 32 33 34 35 36 37 38 39 40 41 |
import React, { useState } from 'react'; import { makeStyles } from '@material-ui/core/styles'; import Paper from '@material-ui/core/Paper'; import Typography from '@material-ui/core/Typography'; import Button from '@material-ui/core/Button'; import './App.css'; function App() { const useStyles = makeStyles(theme => ({ root: { padding: theme.spacing(3, 2), }, })); const classes = useStyles(); const [text, setText] = useState("Text Before chenged") return ( <div className="App"> <Paper className={classes.root}> <Typography variant="h5" component="h3"> Sample Component </Typography> <Typography component="p"> {text}</Typography> <Button variant="contained" color="primary" onClick={() => setText("Button Pressed!")} > PRESS HERE! </Button> </Paper> </div> ); } export default App; |
保存してブラウザ上でボタンをクリックし「Text Before chenged」が「Button Pressed!」に変れば問題ありません。
ここではReactのフックを使ってtextというステートをsetText関数で変更し、
textに関連している全てのコンポーネントを自動で更新しています。
詳しくはReact公式: ステートフックの利用法を参照してください。(Languagesから言語を日本語にできます)
JavaScriptの関数は非同期に処理される点について注意してください。(前の関数の終了を待たずに次の関数が実行されます。)
アクテビティ
1. インプットフォームを置いて、入力した内容が下のスペースに表示されるようにしましょう。
(インプットフォームのonChangeの関数にステートフックを指定してテキストの変数を管理しましょう)
参考:https://material-ui.com/components/text-fields/
2. ボタンを押したらインプットフォームに入力された内容が下に追加されていくようにしましょう。
javascriptのmap関数を使うと便利です。
参考:https://reactjs.org/docs/lists-and-keys.html
3. 一行ごとにラジオボタンを表示させましょう。
参考:https://material-ui.com/components/radio-buttons/
下ようになっていれば今回のアクティビティは完了です。
参考リンク: